The Battle of Hastings, a defining clash in medieval warfare, marked the Norman victory that ended Anglo-Saxon rule and initiated the Norman Conquest of England. This pivotal event in the succession crisis of 1066 showcased Norman invasion tactics against the Anglo-Saxon army, reshaping the English monarchy and introducing the feudal system. As a historical research expert, I’ll provide a detailed explanatory analysis of this landmark battle, incorporating its timeline, battlefield layout, and profound impact on European history.
This article explores the military strategy, battle tactics, and historical turning point that Hastings represents, highlighting the Anglo-Saxon defeat and Norman triumph. From William the Conqueror’s leadership to Harold Godwinson’s shield wall, the battle’s legacy is captured in artifacts like the Bayeux Tapestry, underscoring the Viking invasion’s context and the political transformation of England. In the broader scope of 11th-century warfare, Hastings exemplified cavalry tactics’ superiority and the House of Normandy’s rise over the House of Wessex, influencing English history for centuries.
The Battle of Hastings was not just a military confrontation but a catalyst for the Norman Conquest of England, where Norman military reforms clashed with Anglo-Saxon resistance. Involving Harald Hardrada’s earlier Viking invasion at Stamford Bridge and Tostig Godwinson’s betrayal, the battle at Senlac Hill near Pevensey and London highlighted the English succession crisis. Its depiction in the Bayeux Tapestry provides vivid insights into knightly combat and medieval battle tactics, making it a cornerstone of Anglo-Saxon nobility’s downfall and the House of Stuart’s distant roots. The battle’s significance extends to Westminster Abbey, where William was crowned, symbolizing the shift in European feudalism.
When Was the Battle of Hastings?
The Battle of Hastings took place on October 14, 1066, during a clear autumn day in southern England. This one-day engagement was the climax of the Norman invasion led by William, Duke of Normandy (later William the Conqueror), against King Harold Godwinson of England. The battle occurred in the wake of Harold’s victory over the Viking invasion at the Battle of Stamford Bridge on September 25, 1066, where he defeated Norwegian King Harald Hardrada and his brother Tostig Godwinson. Exhausted from the 250-mile march south, Harold’s Anglo-Saxon army faced William’s fresh Norman forces after the Normans landed at Pevensey on September 28.
The timing was influenced by the English succession crisis following King Edward the Confessor’s death on January 5, 1066, without an heir. Harold was crowned on January 6, but William claimed the throne based on a purported oath from Harold in 1064. Hardrada also claimed it via prior agreements. The battle’s date fell during harvest season, with mild weather (temperatures around 15–20°C or 59–68°F) and dry ground favoring cavalry, though morning dew may have affected footing. This period in 11th-century English history reflected broader European dynastic struggles, with the Houses of Wessex, Normandy, and Norway vying for control. Hastings occurred just nine months after Edward’s death, accelerating the political transformation that defined medieval England.
Battle of Hastings Map
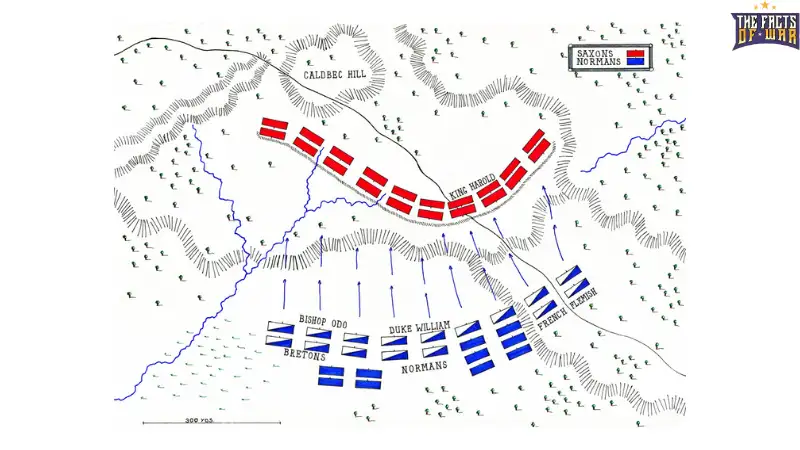
A Battle of Hastings map is essential for grasping the terrain that played a crucial role in the Norman victory. Historical reconstructions, such as those from English Heritage or Wikipedia, depict the battlefield on Senlac Hill (now Battle Abbey site) near Hastings, England, at coordinates 50°54′43″N 0°29′15″E. The field spans a ridge about 1 mile wide, with the English positioned on the hilltop and Normans at the base, covering roughly 2 square miles of open farmland flanked by woods and marshes.
Key features on typical maps include:
- Geographical Layout: Senlac Hill rises 50–60 feet, with a gentle slope facing south toward the Normans’ approach from Hastings (7 miles south). Dense woods on east and west flanks limited maneuvers, funneling attacks to the center. A small stream and marshy ground at the base hindered cavalry.
- English Positions: Blue lines show Harold’s ~7,000–8,000 Anglo-Saxon army in a dense shield wall along the 800-yard ridge crest, with housecarls (elite warriors) in the center and fyrd (militia) on flanks. Reserves were minimal, with archers sparse.
- Norman Positions: Red lines illustrate William’s ~7,000–10,000 men in three lines: archers/crossbowmen front, infantry middle, cavalry rear. Divided into left (Bretons), center (Normans), right (Flemish/French). Maps note feigned retreats pulling English down the slope.
- Battle Phases: Color-coded zones depict initial Norman advance (9 a.m.), archery barrage, infantry assault, cavalry charges, feigned retreats (mid-morning), English pursuits, and final breakthrough (late afternoon). Harold’s death spot is marked near the hilltop.
- Strategic Features: Shaded slopes show charge difficulties; Bayeux Tapestry scenes are inset for visual reference. Nearby Pevensey and London are noted for campaign context.
Maps from Battle of Agincourt comparisons (though different battle) emphasize hilltop advantages, but at Hastings, it favored defenders initially. These visualizations, often interactive online, highlight cavalry tactics’ evolution and the battle’s confined layout. They illustrate how William’s mixed arms overcame Harold’s static defense, a key in Norman military reforms.
Summary Battle of Hastings: A Detailed Chronicle of the Clash
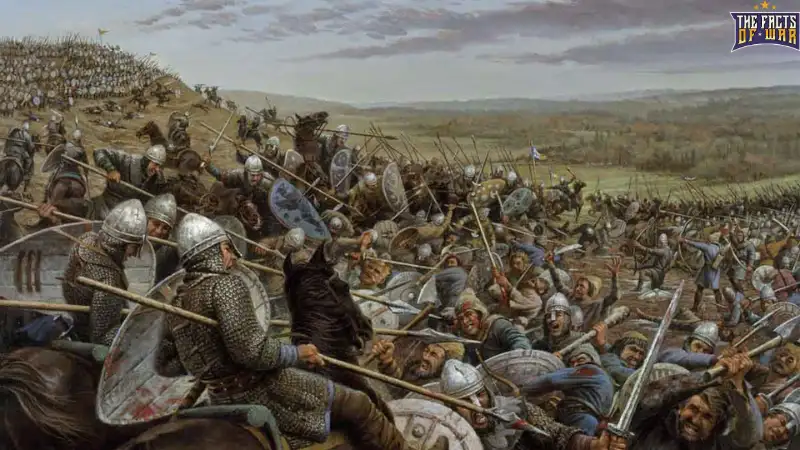
The Battle of Hastings summary reveals a day-long struggle where innovative Norman tactics overcame a steadfast Anglo-Saxon defense, unfolding from dawn to dusk with phases of advance, feint, and breakthrough. This very detailed account, based on the Bayeux Tapestry, William of Poitiers’ chronicles, and modern analyses, covers the prelude, deployments, key actions, and aftermath.
Prelude: The Succession Crisis and Invasions (January–October 1066)
The battle stemmed from the English succession crisis after Edward the Confessor’s death on January 5, 1066. Harold Godwinson, Earl of Wessex, was crowned January 6, but William claimed Edward promised him the throne, reinforced by Harold’s 1064 oath during a shipwreck in Normandy. Harald Hardrada of Norway also claimed it via prior kings’ agreements, allied with Harold’s brother Tostig, exiled for tyranny.
William assembled 7,000–10,000 men (2,000 cavalry, 1,000 archers, 4,000 infantry) in Normandy, building a fleet of 700 ships. Harold mobilized the fyrd but disbanded it September 8 due to harvest, leaving housecarls. Hardrada landed September 20 at Fulford, defeating northern earls; Harold marched 200 miles in four days, surprising them at Stamford Bridge September 25. In a day-long battle, Harold’s forces killed Hardrada and Tostig, but lost 5,000, leaving his army fatigued.
William landed unopposed at Pevensey September 28, building a castle at Hastings. Harold marched south, arriving October 13 with 7,000–8,000 (2,000 housecarls, 5,000 fyrd). Scouts spotted William; Harold chose defense on Senlac Hill, 7 miles from Hastings.
Deployments: Morning of October 14
At dawn, Harold positioned on the 880-yard ridge crest: housecarls center with battle-axes and shields, fyrd on flanks. The shield wall—a dense line of interlocking shields—was impenetrable to arrows if held. Harold at center with standards; no archers or cavalry significant.
William, at the base, arrayed ~1 mile away: archers front, infantry middle, cavalry rear. Divided into Bretons (left under Alan Rufus), Normans (center under William), Flemish/French (right under Eustace of Boulogne). Papal banner blessed the army; William wore relics for luck.
Battle started ~9 a.m., lasting 9 hours until dusk.
Phase 1: Opening Archery and Infantry Assault (9–10 a.m.)
Norman archers advanced to 100 yards, loosing volleys, but uphill angle and shields minimized impact arrows stuck in shields or overshot. English hurled javelins and stones, disrupting archers who retreated.
Norman infantry charged uphill, clashing with the shield wall in hand-to-hand. English axes cleaved shields and helmets, repelling them with heavy losses. Bretons on left panicked and fled downhill.
Phase 2: Feigned Retreats and English Pursuit (10 a.m.–Noon)
Seeing the Breton rout, William’s center wavered. Rumors of his death spread; William removed his helmet to rally, shouting encouragement. Normans feigned retreat a tactic from Sicily campaigns to draw English down.
Disciplined housecarls held, but fyrd pursued, breaking formation. At the hill’s base, Norman cavalry wheeled, slaughtering isolated groups. This repeated twice, thinning English flanks but not breaking the wall. Bayeux Tapestry depicts these feints vividly, with English falling into traps.
Phase 3: Afternoon Attrition and Archery Shift (Noon–4 p.m.)
Fighting stalemated; both sides exhausted. William altered tactics: archers fired high-arcing volleys over shields, raining arrows on rear ranks. Infantry and cavalry alternated attacks, wearing down the wall. English, static without relief, suffered mounting casualties, with housecarls falling to arrows or charges.
By late afternoon, the line thinned; breaches appeared as fyrd fled.
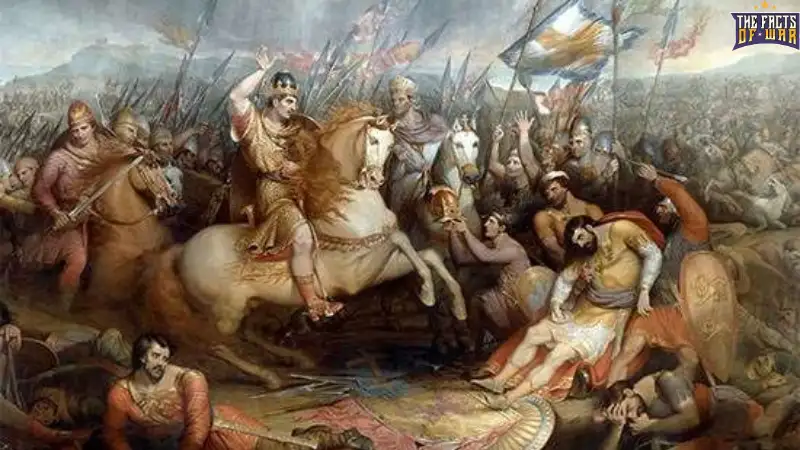
Phase 4: Final Charge and Harold’s Death (4–6 p.m.)
With dusk approaching, William launched a general assault. Normans breached at multiple points; Harold, defending the standard, was struck by an arrow in the eye (per Tapestry, though debated some say hacked down). His death caused panic; English routed, pursued to Malfosse ravine where many died in ambushes.
William claimed the field by nightfall, but didn’t pursue far due to darkness.
Aftermath: Immediate Consequences
English losses decimated nobility; Harold’s body, identified by tattoos, was buried seaside (per legend). William marched to London, crowned at Westminster Abbey Christmas 1066. This chronicle highlights Normans’ adaptability and English discipline’s limits, defining the battle’s outcome.
Summary Battle of Hastings
The Battle of Hastings was a day-long clash where William’s Normans defeated Harold’s Anglo-Saxons through feigned retreats and archery, leading to Harold’s death and Norman dominance. Casualties were high, but the victory secured William’s throne.
Casualties of the Battle of Hastings
The casualties of the Battle of Hastings were significant but estimates vary due to limited records. Norman sources like William of Poitiers report 2,000 Norman dead, while English chronicles suggest higher. Modern estimates: English 4,000 killed (half their force, including Harold and brothers Gyrth/Leofwine); Normans 2,000 dead. Total ~6,000–7,000 fatalities, with wounded unrecorded but likely double. The Bayeux Tapestry depicts the carnage, with bodies piling under horses. English nobility suffered disproportionately, aiding Norman control.
Who Won the Battle of Hastings?
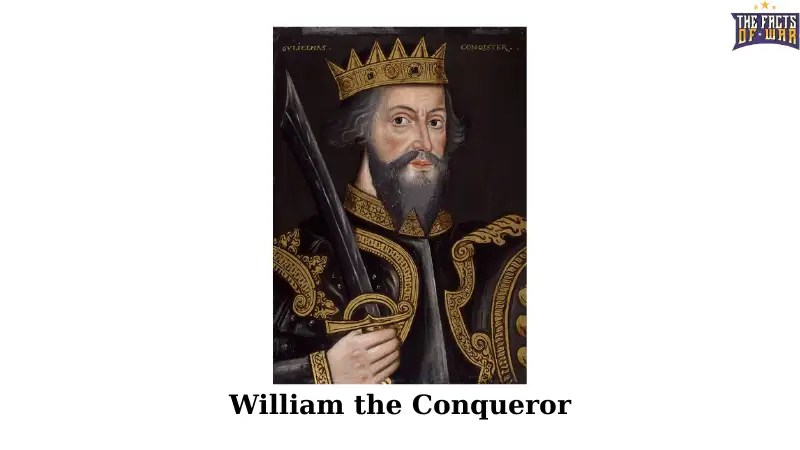
The Norman army, led by William the Conqueror, won the Battle of Hastings, decisively defeating Harold Godwinson’s Anglo-Saxon forces and paving the way for the Norman Conquest. William’s tactical adaptability overcame Harold’s defensive strength, with Harold’s death sealing the outcome. This victory ended the House of Wessex’s rule and initiated the House of Normandy’s era.
Battle of Hastings Significance
The Battle of Hastings’s significance is profound, as a historical turning point that initiated the Norman Conquest and transformed England. It ended Anglo-Saxon dominance, introducing the feudal system, Norman French language (influencing English), and centralized governance via the Domesday Book (1086 census). William’s coronation at Westminster Abbey on Christmas 1066 solidified the House of Normandy, leading to castles like the Tower of London and suppression of rebellions.
Militarily, it demonstrated cavalry tactics and combined arms’ superiority over infantry shield walls, influencing medieval warfare. The Anglo-Saxon downfall reshaped society, with Norman nobility replacing English, fostering feudalism. Culturally, the Bayeux Tapestry (1070s) preserves its narrative, while literature like “Ivanhoe” romanticizes the era. In European history, it linked England to continental affairs, affecting future conflicts. Hastings’ legacy endures in reenactments and studies of 11th-century English history.
Conclusion
The Battle of Hastings remains a cornerstone of English history, symbolizing conquest and change. From its date on October 14, 1066, to maps of Senlac Hill, this clash’s detailed summary, casualties, Norman victory, and profound significance illuminate a transformative moment. Reflecting on William the Conqueror, Harold Godwinson, Harald Hardrada, and sites like Pevensey and London, Hastings’ legacy in the Norman Conquest inspires reflections on fate and leadership. As a chapter in medieval warfare, it underscores innovation’s power in shaping nations.