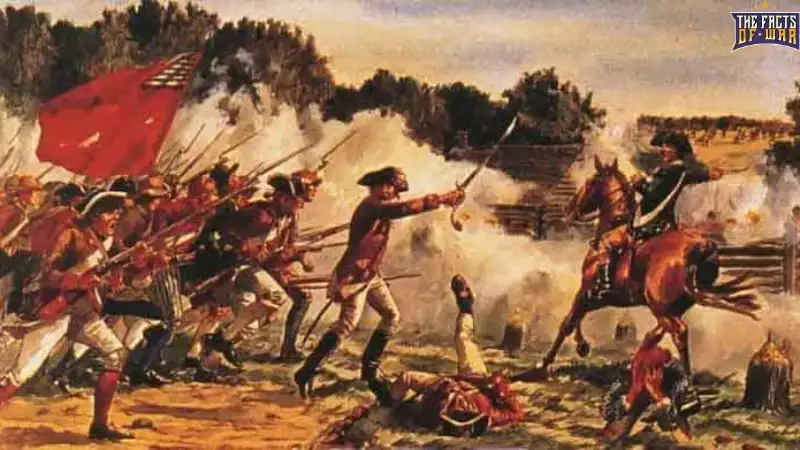
The Battle of Bemis Heights, the climactic second engagement of the Battle of Saratoga, stands as a turning point in the American Revolutionary War, delivering an American victory that shattered British hopes in the northern campaign. This revolutionary battle showcased military strategy and battle tactics, with the Continental Army’s defensive positions repelling a desperate British assault, boosting military morale and paving the way for the Franco-American alliance. As a historical research expert, I’ll provide a detailed explanatory analysis of this pivotal colonial rebellion event, incorporating its timeline, battlefield layout, and enduring impact on the war of independence.
This article explores the Saratoga campaign’s role in American patriotism, emphasizing strategic retreat, infantry warfare, and European intervention that shifted the conflict’s momentum. From Horatio Gates’ command to Benedict Arnold’s heroics, the battle at Bemis Heights highlighted American Revolutionary tactics against British military strategy, securing Continental Army success and inspiring the American independence movement. In the broader context of Revolutionary War battles, Bemis Heights was where Daniel Morgan’s riflemen and Hessian troops clashed, leading to John Burgoyne’s surrender and the Revolutionary War turning point that galvanized French support for America.
The Battle of Bemis Heights, often called the Second Battle of Saratoga or Battle of Saratoga’s second phase, exemplified the strategic Hudson River’s importance, with Morgan’s Riflemen playing a key role in the Bemis Heights defense. Its legacy includes the Treaty of Alliance 1778, bringing the French Army into the fray, and its status as a symbol of American resilience against British Northern strategy. The battle’s historical significance lies in its contribution to the American colonies’ fight for freedom, with outcomes like Burgoyne’s surrender influencing guerrilla warfare tactics and the war’s trajectory toward victory.
When Was the Battle of Bemis Heights?
The Battle of Bemis Heights took place on October 7, 1777, as the second and decisive engagement of the larger Battle of Saratoga during the American Revolutionary War. This one-day battle occurred near Saratoga, New York, approximately 30 miles north of Albany, in a region of dense woods, rolling hills, and open fields that favored defensive warfare. The engagement began around 2 p.m. and lasted until dusk, with intermittent fighting under clear autumn skies and mild temperatures (around 15–20°C or 59–68°F), though earlier rains had softened the ground, affecting mobility.
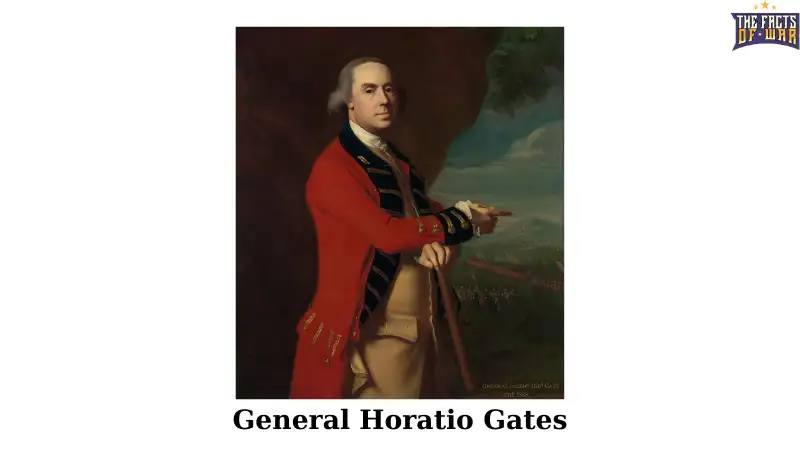
The battle’s timing was shaped by the Saratoga campaign, which started in June 1777 when British General John Burgoyne launched an invasion from Canada to seize the Hudson River valley and isolate New England. After the First Battle of Saratoga at Freeman’s Farm on September 19, 1777, both sides reinforced: American forces under Horatio Gates grew to over 15,000 with militia arrivals, while Burgoyne’s 6,000 troops dwindled due to desertions and supply shortages. Desperate for a breakthrough before winter, Burgoyne ordered a reconnaissance in force on October 7, leading to the clash at Bemis Heights.
This date fell during the fall harvest season, with long daylight hours (sunset around 6 p.m.) allowing for extended combat. The battle’s occurrence in early October 1777 came amid other revolutionary events, such as the British occupation of Philadelphia on September 26, but Saratoga’s outcome overshadowed it, shifting momentum. The engagement ended the 1777 military campaigns in the north, with Burgoyne’s surrender on October 17 marking a major milestone in the war of independence.
Battle of Bemis Heights Map: Terrain and Strategic Positions
A Battle of Bemis Heights map is essential for visualizing the terrain that enabled the American victory and British defeat. Historical maps, such as those from the American Battlefield Trust or Wikipedia, depict Bemis Heights as a series of bluffs overlooking the Hudson River valley near Saratoga, New York, at coordinates approximately 42°59′N 73°38′W. The battlefield spans wooded hills, open fields, and ravines, covering about 3 square miles, with the heights providing natural defensive advantages.
Key features on typical maps include:
- Geographical Layout: Bemis Heights rises 100 feet above the Hudson River floodplain, with dense forests on the flanks and clearings like Barber’s Wheatfield in the center. Freeman’s Farm lies 2 miles north, connected by the Great Redoubt hill.
- American Defensive Positions: Blue lines show Horatio Gates’ Continental Army (~13,000–15,000 men) in fortified lines: earthworks and abatis along the bluffs, with Thaddeus Kosciuszko’s engineering creating a “fishhook” shape. Daniel Morgan’s riflemen positioned on the left at Freeman’s Farm woodline, Enoch Poor’s brigade in the center, and Ebenezer Learned’s on the right. Artillery (22 guns) covered fields from heights.
- British Advance Paths: Red arrows illustrate John Burgoyne’s reconnaissance force (~1,500–2,000 men) advancing south: Simon Fraser’s column on the right through woods to high ground, Friedrich Riedesel’s Hessians in the center along the river road, and James Hamilton’s on the left toward Barber’s Farm. Maps show the ill-fated probe turning into a full battle.
- Battle Phases: Color-coded zones depict the initial British probe (2 p.m.), American counterattacks (3 p.m.), Arnold’s unauthorized charge on Breymann’s Redoubt (5 p.m.), and British retreat (dusk). Insets detail the wheatfield melee and redoubt assault.
- Strategic Features: The Hudson River is shown as a barrier on the east, with supply roads from Albany noting American logistical advantages. Shaded woods highlight ambush spots for Morgan’s Riflemen.
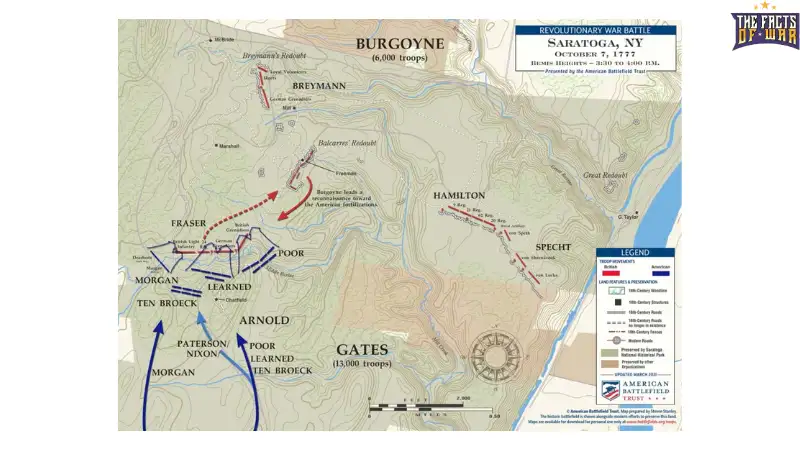
Maps from Saratoga National Historical Park emphasize the heights’ defensive strength, explaining how Gates’ caution and Arnold’s aggression combined for success. These visualizations highlight the battle’s confined space, where terrain favored riflemen over British bayonets, contributing to the Revolutionary War legacy.
Summary Battle of Bemis Heights: A Detailed Chronicle of the Engagement
The Battle of Bemis Heights, the second and decisive phase of Saratoga, was a chaotic afternoon clash where American boldness overcame British desperation. This very detailed summary covers the prelude, phases, key actions, and aftermath, drawing from historical sources for depth.
Prelude: The Saratoga Campaign and Interlude After Freeman’s Farm (June–October 6, 1777)
British General John Burgoyne’s northern campaign aimed to seize the Hudson River, isolating New England. Starting with 8,000 (British regulars, Hessian troops, Loyalists, Canadians, Natives), he captured Fort Ticonderoga July 5 but bogged down in wilderness, taking 23 days for 23 miles to Hudson. American General Philip Schuyler felled trees and harassed supplies, while militia swelled under new commander Horatio Gates to 9,000 by September.
At Freeman’s Farm (September 19), Burgoyne’s 4,300 probed American lines at Bemis Heights, fortified by Kosciuszko with earthworks and abatis. Daniel Morgan’s 500 riflemen ambushed, but the British held the field at cost (600 casualties vs. American 320). Gates favored defense; Arnold urged attack.
Interlude (September 20–October 6): Americans reinforced to 13,000 with militia like John Stark’s; Burgoyne’s 6,000 faced desertions and no aid from Clinton in New York. Burgoyne rationed food, awaiting supplies. Tensions boiled: Gates sidelined Arnold after a quarrel, but militia arrivals boosted morale.
Burgoyne, desperate, planned a reconnaissance October 7 to probe the left flank for artillery positions or bypass to Albany.
Phase 1: British Reconnaissance and Initial Clash (2:00–3:00 p.m., October 7)
Burgoyne led 1,500–2,000 (mostly regulars and Hessians): Simon Fraser’s advanced corps (500) on right through woods to Balcarres Redoubt hill; Friedrich Riedesel’s Germans (500) center along river road; James Hamilton’s brigade (600) left toward Barber’s Wheatfield. 11 guns supported.
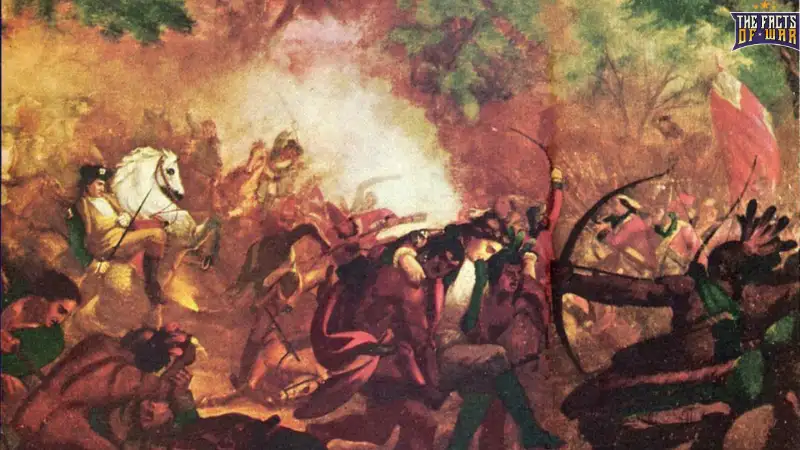
At 2 p.m., the force advanced; American scouts spotted them. Gates ordered Morgan’s 400 riflemen and Poor’s 800 brigade to attack left (British right), Learned’s 1,100 center. At 2:30 p.m., in Barber’s Wheatfield, Poor engaged Hamilton’s pickets; Morgan flanked Fraser’s grenadiers from woods, his Virginia riflemen picking off officers at 300 yards with accurate Kentucky rifles. Rifle fire decimated British; Fraser fell mortally wounded (shot by Timothy Murphy, legend says).
Riedesel reinforced the center with artillery, stabilizing but under fire.
Phase 2: American Counterattacks and British Counter (3:00–4:00 p.m.)
Learned’s brigade joined, pushing the British back. Morgan shifted right to enfilade; Americans charged wheatfield, bayoneting British gunners. British lines wavered; Hamilton’s men fled, but Riedesel’s Jaegers held. Arnold, defying Gates, galloped in, rallying troops with sword waves, directing attacks on the British center.
British grenadiers countercharged, retaking guns briefly, but American numbers (now 3,000+) overwhelmed. By 4 p.m., the British retreated to Balcarres Redoubt, a log breastwork.
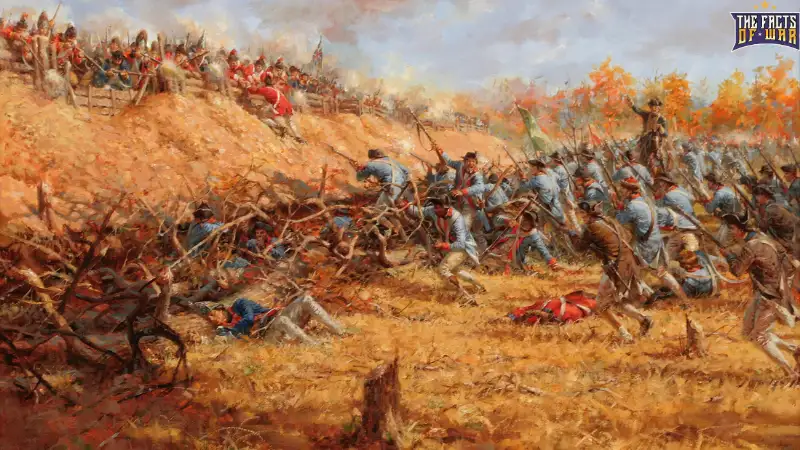
Phase 3: Assault on Balcarres and Breymann Redoubts (4:00–5:00 p.m.)
Americans assaulted Balcarres Redoubt (400 British), but volleys repelled them with heavy losses. Arnold redirected to Breymann’s Redoubt on the right (200 Germans), weakly defended. At 5 p.m., Arnold led charge through sally port, shot in leg but capturing it, killing Breymann.
This flanked Balcarres; the British withdrew as dusk fell ~6 p.m., abandoning guns.
Aftermath: Burgoyne’s Retreat and Surrender (October 8–17)
Burgoyne retreated north to Saratoga, digging in but surrounded by Gates’ 20,000. Short on food, he negotiated; on October 17, surrendered 5,895 men under “Convention of Saratoga,” paroled but later imprisoned. Casualties are low compared to total loss.
This chronicle highlights Arnold’s heroics (despite no command), Morgan’s riflemen, and Gates’ caution, turning British strategy into disaster.
Summary Battle of Bemis Heights
The Battle of Bemis Heights was a resounding American victory, where Gates’ Continentals repelled Burgoyne’s probe, leading to his encirclement and surrender. Casualties were ~500 American, ~1,100 British; the win secured the French alliance.
Casualties of the Battle of Bemis Heights
The casualties of the Battle of Bemis Heights were relatively moderate but impactful, with the Continental Army suffering approximately 150 killed and 350 wounded, totaling ~500. Morgan’s Riflemen and Arnold’s ad hoc force bore the brunt. The British Army lost around 440 killed and 700 wounded, with 278 captured, totaling ~1,418 over 90% of Burgoyne’s force engaged. Hessian troops suffered proportionally, with officers like Fraser’s death demoralizing. Civilian casualties were negligible, as the rural area had few inhabitants. These losses crippled Burgoyne, leading to surrender, while American wounds like Arnold’s leg (leading to amputation) symbolized sacrifice.
Who Won the Battle of Bemis Heights?
The Continental Army, under General Horatio Gates, won the Battle of Bemis Heights, decisively defeating British General John Burgoyne and forcing his surrender 10 days later. This American victory was achieved through superior defensive positions, Morgan’s Riflemen’s marksmanship, and Benedict Arnold’s heroics, despite Gates’ passive command. Burgoyne’s loss ended the British Northern strategy, marking a turning point in the war of independence.
Battle of Bemis Heights Significance
The Battle of Bemis Heights’s significance is profound, as a Revolutionary War turning point that convinced France to ally with America via the Treaty of Alliance 1778, providing troops, navy, and funds crucial for victory. Burgoyne’s surrender demoralized Britain, shifting their strategy southward and boosting American military morale. It preserved Albany, preventing New England’s isolation, and demonstrated colonial forces’ ability to defeat regulars, inspiring enlistments.
Politically, it galvanized the independence movement, with the Continental Congress using it for propaganda. Militarily, it validated guerrilla tactics and riflemen, influencing future campaigns. The battle’s legacy includes Saratoga National Historical Park and its portrayal in literature, symbolizing American patriotism. In historical significance, Bemis Heights accelerated European intervention, tipping the scales toward independence.
Conclusion
The Battle of Bemis Heights endures as a beacon of determination in the American Revolutionary War. From its date on October 7, 1777, to maps of strategic bluffs, this engagement’s detailed summary, casualties, American victory, and profound significance illuminate a defining moment. Reflecting on Gates, Arnold, Burgoyne, Morgan, and sites like Freeman’s Farm, Bemis Heights’ legacy in the Franco-American alliance inspires reflections on unity. As a chapter in colonial rebellion, it reminds us of strategy’s power in achieving freedom.